Highlight White (Gyroscopic effect) iOS 26

Highlight White (Gyroscopic effect) iOS 26

Want to adjust the brightness of the iOS 26 gyroscopic effect? No problem — I’ve got you covered! 👀

Important Notes:

Check out the X post for this mod: [click here]

Please note: Setting the value to 1 does not fully disable the gyroscopic effect. While the light remains visible, its brightness will be significantly reduced. The maximum value for this mod is 9999.

I've done my best to make this tutorial as easy as possible. This is the furthest I can take it.

Instructions:

Step 1:

Open Cowabunga Lite, and connect your device. Make sure to disable Find My and iCloud Backup on your device. If you haven't already, take a moment to read the important notes. Additionally, be sure to back up your device before making any changes, so you have a safe copy of your data in case something goes wrong. If you're unsure of your UDID, you can find it using the link below.

Step 2:

For both macOS and Windows users:
Install the Shortcuts app on your iPhone, iPad, or Mac, then download the shortcut below. Once you have the com.apple.SwiftUI file, save it to your desktop for easy access, and you're ready to continue.

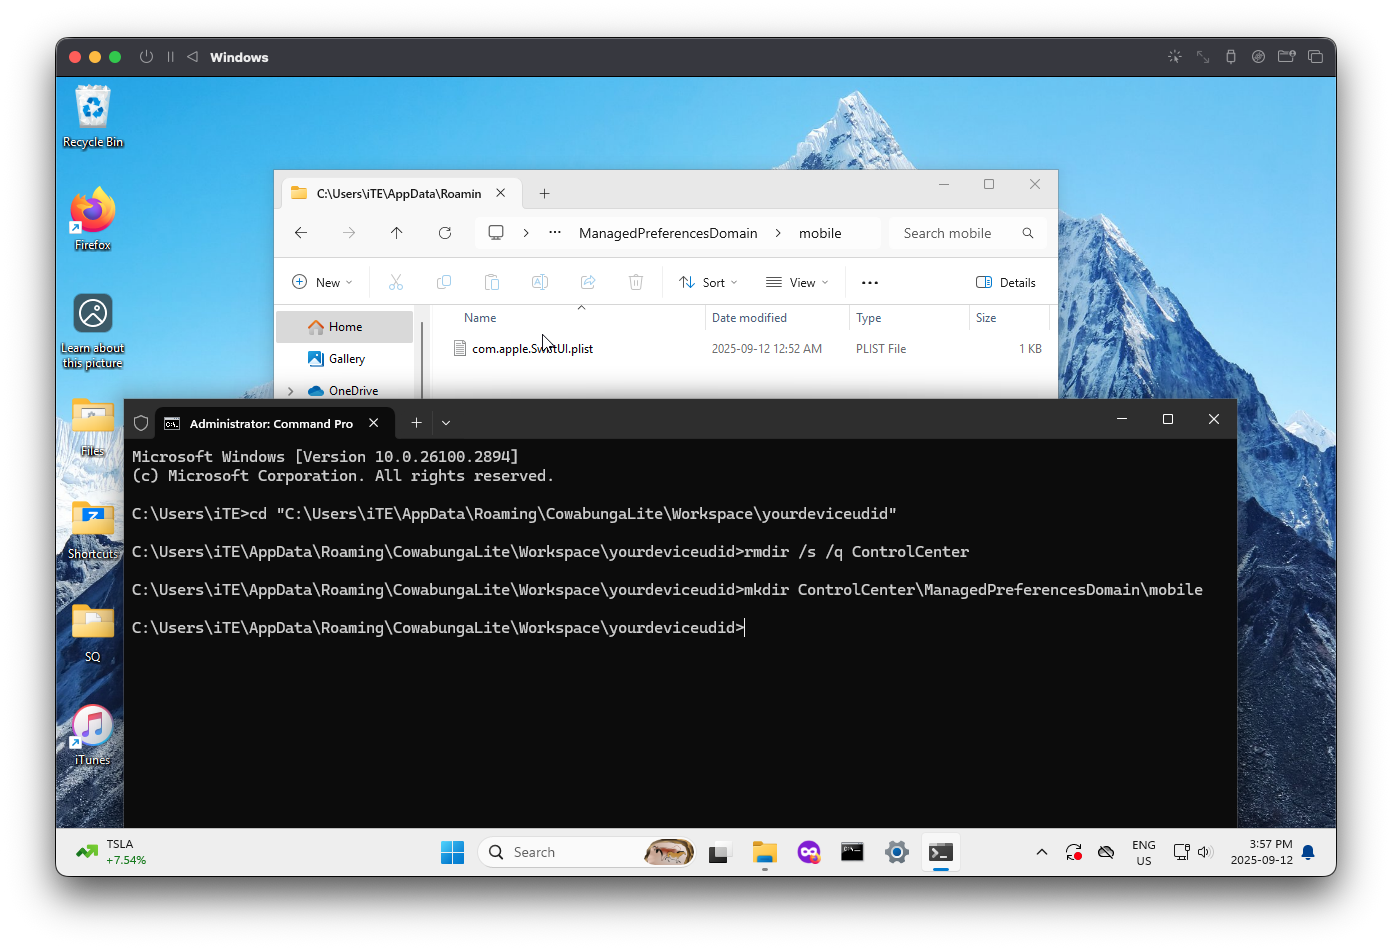
Windows Users: Skip to Step 3 after grabbing the required file from Shortcuts.

For macOS Users:
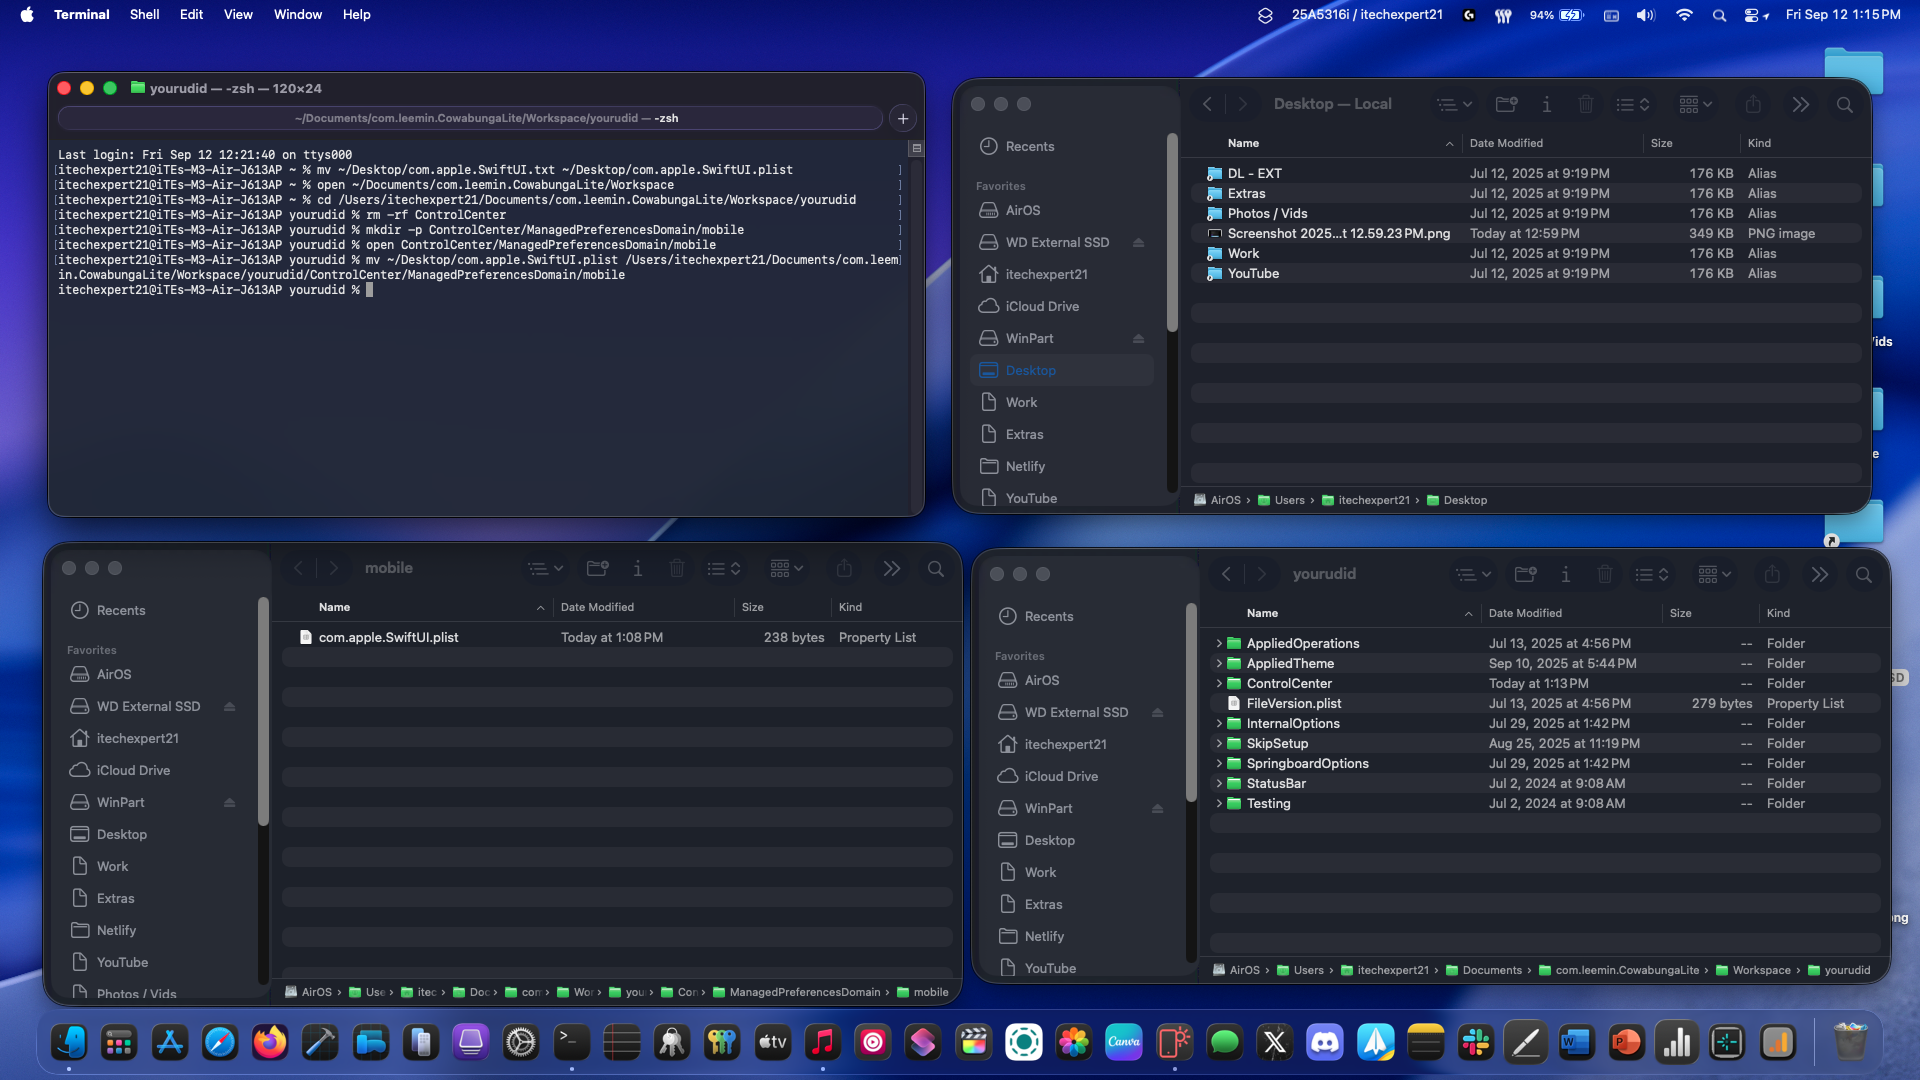
1. Open Terminal, then run: "mv ~/Desktop/com.apple.SwiftUI.txt ~/Desktop/com.apple.SwiftUI.plist"
2. Run: "open ~/Documents/com.leemin.CowabungaLite/Workspace"
3. Type: "cd" then drag your UDID folder into Terminal and press Enter.
4. Run: "rm -rf ControlCenter"
5. Run: "mkdir -p ControlCenter/ManagedPreferencesDomain/mobile"
6. Run: "open ControlCenter/ManagedPreferencesDomain/mobile"
7. Drag and drop com.apple.SwiftUI.plist into the mobile folder, or you can run in Terminal: "mv ~/Desktop/com.apple.SwiftUI.plist " then drag the mobile folder into Terminal and run he command.

To adjust the brightness of the gyroscopic effect again, create a new com.apple.SwiftUI.plist file using the Shortcut below and place it in the mobile folder. After that, apply the mod to your device.

Step 3:

For Windows users (don't include quotes for commands):
1. Find the file you saved and rename it from "com.apple.SwiftUI.txt" to "com.apple.SwiftUI.plist".
2. Press Win + R to open the Run dialog, then paste this address: "%APPDATA%/CowabungaLite/Workspace".
3. Right-click on your UDID folder and copy its path.

Open Command Prompt and run the following commands (you can copy and paste them):
1. cd "paste-your-UDID-folder-path-here"
2. Run: "rmdir /s /q ControlCenter"
3. Run: "mkdir ControlCenter\ManagedPreferencesDomain\mobile"

When you're done, open the Workspace File Explorer window, and go to "ControlCenter → ManagedPreferencesDomain → mobile" and move the "com.apple.SwiftUI.plist" file into this folder.

Step 4:

Next, navigate to the "ControlCenter" section in Cowabunga Lite and click "Enable." Then, go to the "Apply" section and make sure the 'Setup Options' section is turned off to preserve your configuration profiles. For more details, please refer to the FAQ for Cowabunga Lite. Then, click "Apply Changes" (or "Apply Tweaks" if you're on macOS). Your device will display "Restore in Progress." Once the device restarts, you’ll reach the setup screen. Just follow the instructions to complete the setup process.

if you see the "Apps & Data" page with the "do not transfer data" option, select it and continue following the remaining steps.

If you're on iOS 17.2 or higher, you will encounter a new page during setup named "iPhone Partially Setup". On this screen, you'll find two options at the bottom: "Erase and Start Over" and "Continue with Partial Setup". Please select the option below, NOT the first one.

© 2022 – Present iConfig Realm (formerly iConfig Hub). iConfig Realm is not affiliated with Apple Inc.