Step 1:
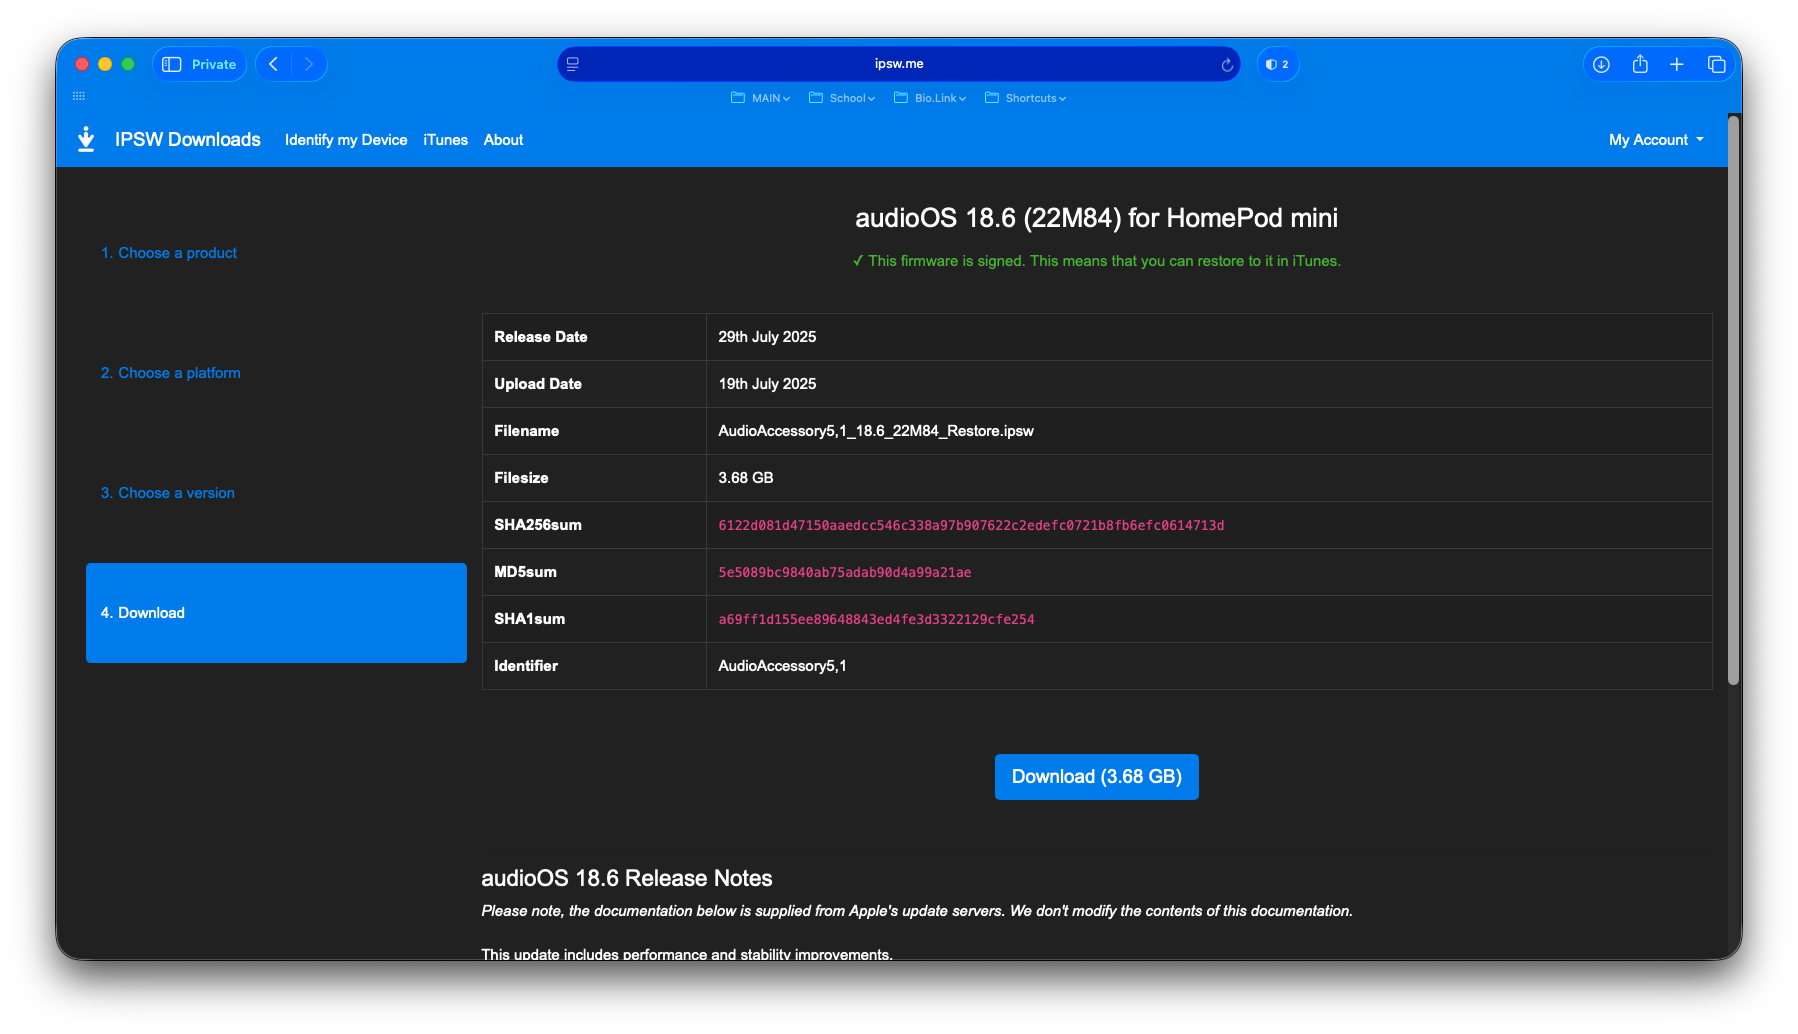
Open a web browser and visit ipsw.me. Select your HomePod and download the IPSW file for the desired software version. Please note that signed IPSW files are required for downgrades; unsigned versions cannot be used.
Need to update or downgrade your HomePod? Here's how!
Please note that this process WILL restore your HomePod. If you encounter any issues during the downgrade, don't hesitate to reach out for assistance. You can DM me on X at @iTechExpert21 and I'll be happy to guide you through the downgrade.
Open a web browser and visit ipsw.me. Select your HomePod and download the IPSW file for the desired software version. Please note that signed IPSW files are required for downgrades; unsigned versions cannot be used.
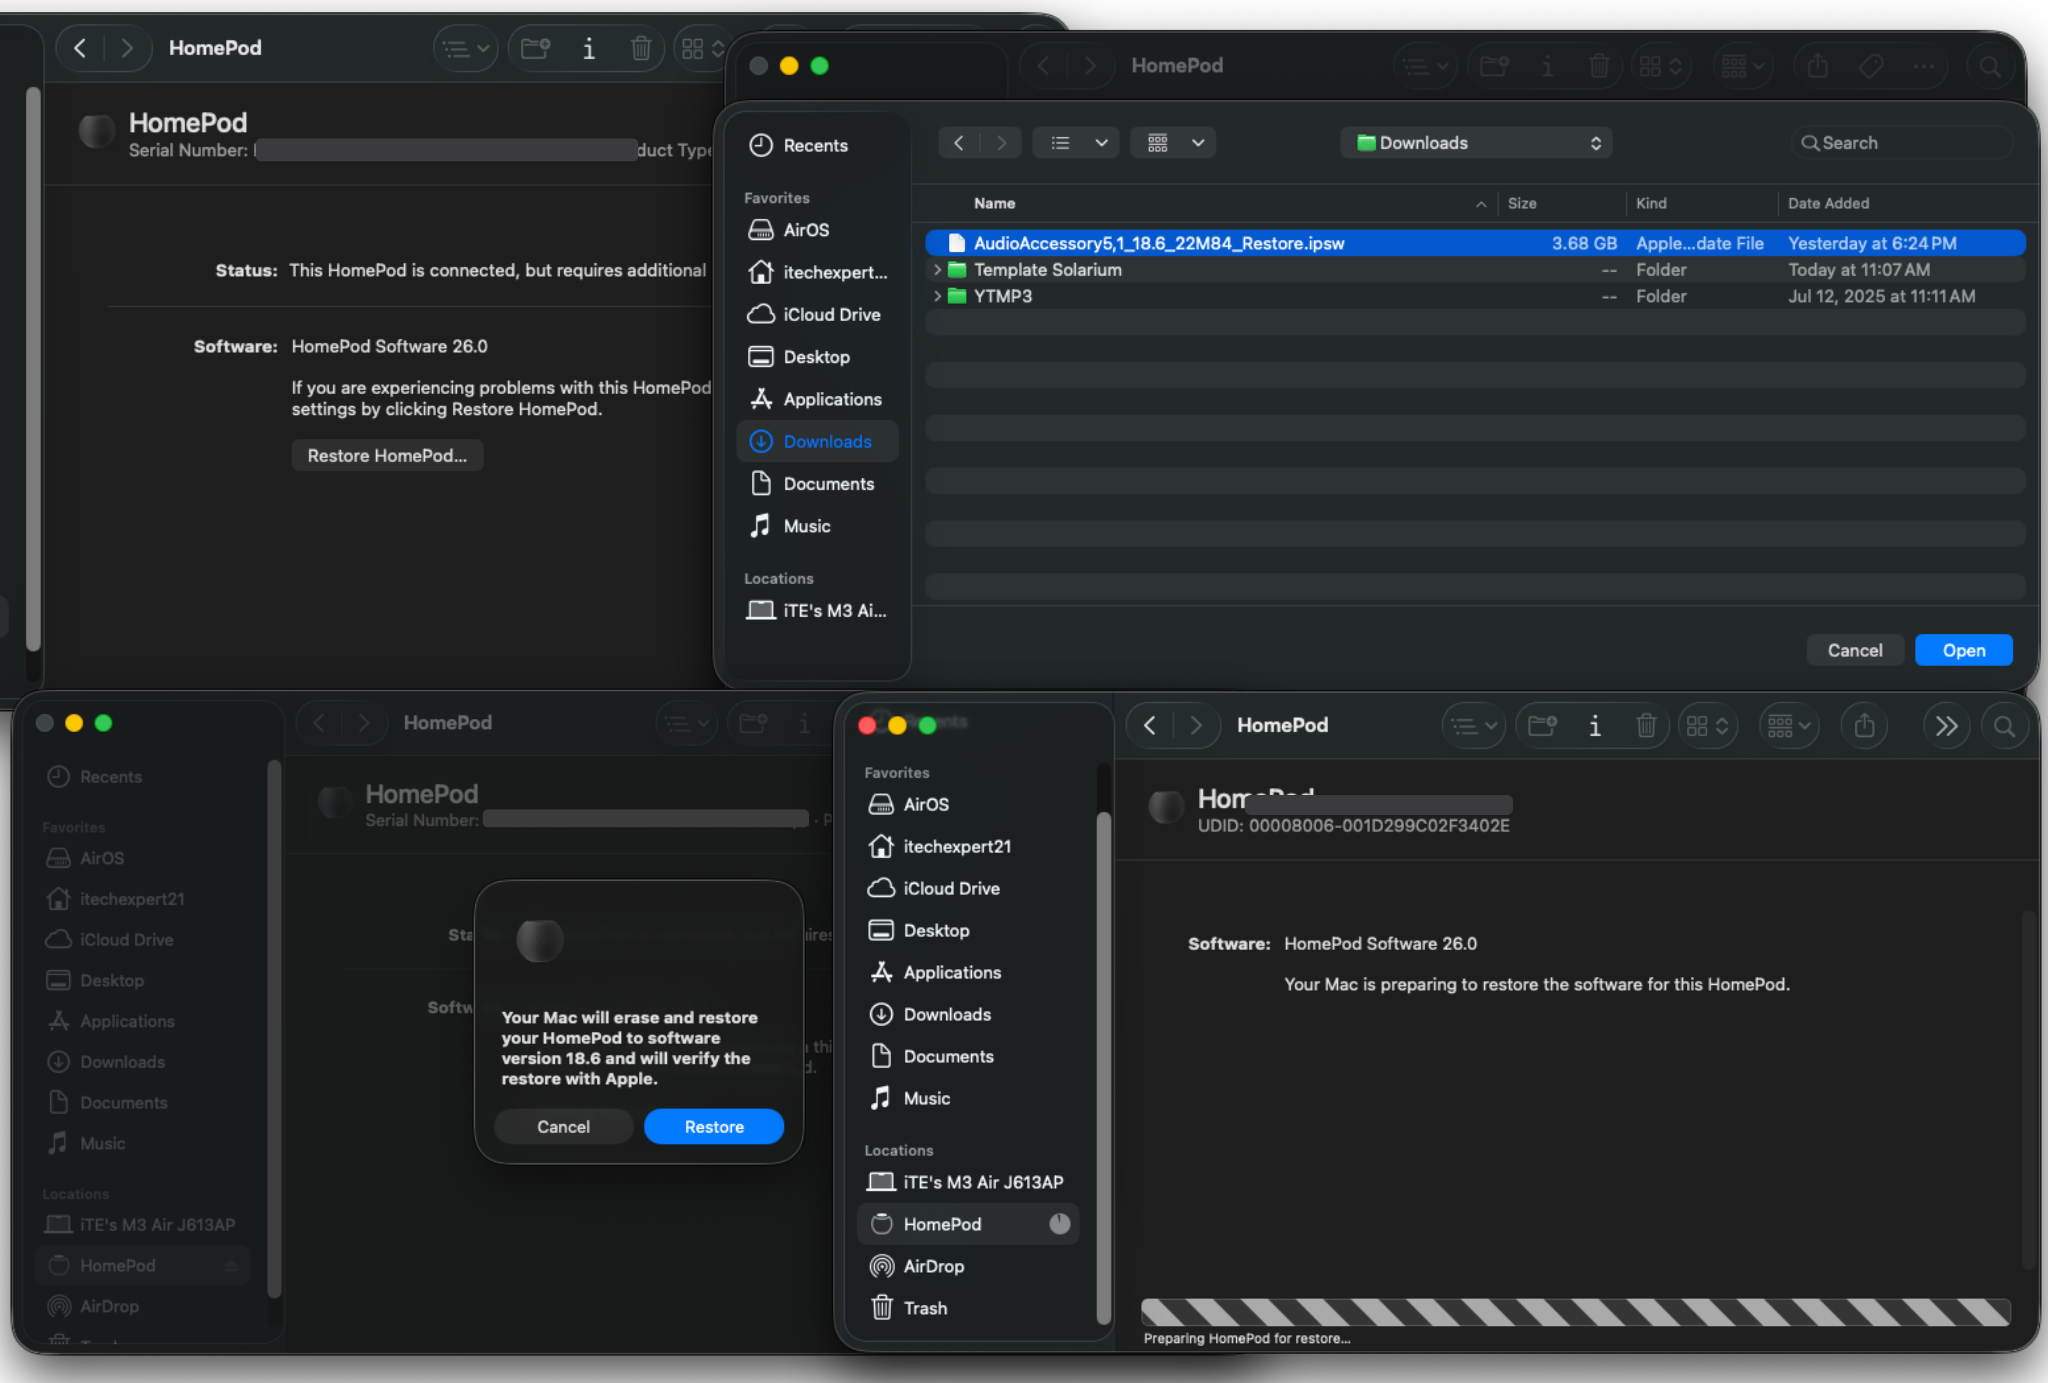
To begin, open Finder and connect your HomePod. Click on your HomePod under *Locations* in the Finder sidebar.
Next, hold down the Option key and click 'Restore'. Select the downloaded iPSW file, then click 'Restore'. Follow the on-screen prompts to start the downgrade. Then, simply wait for the downgrade to complete. Once finished, your HomePod will restart and you can set it up again.
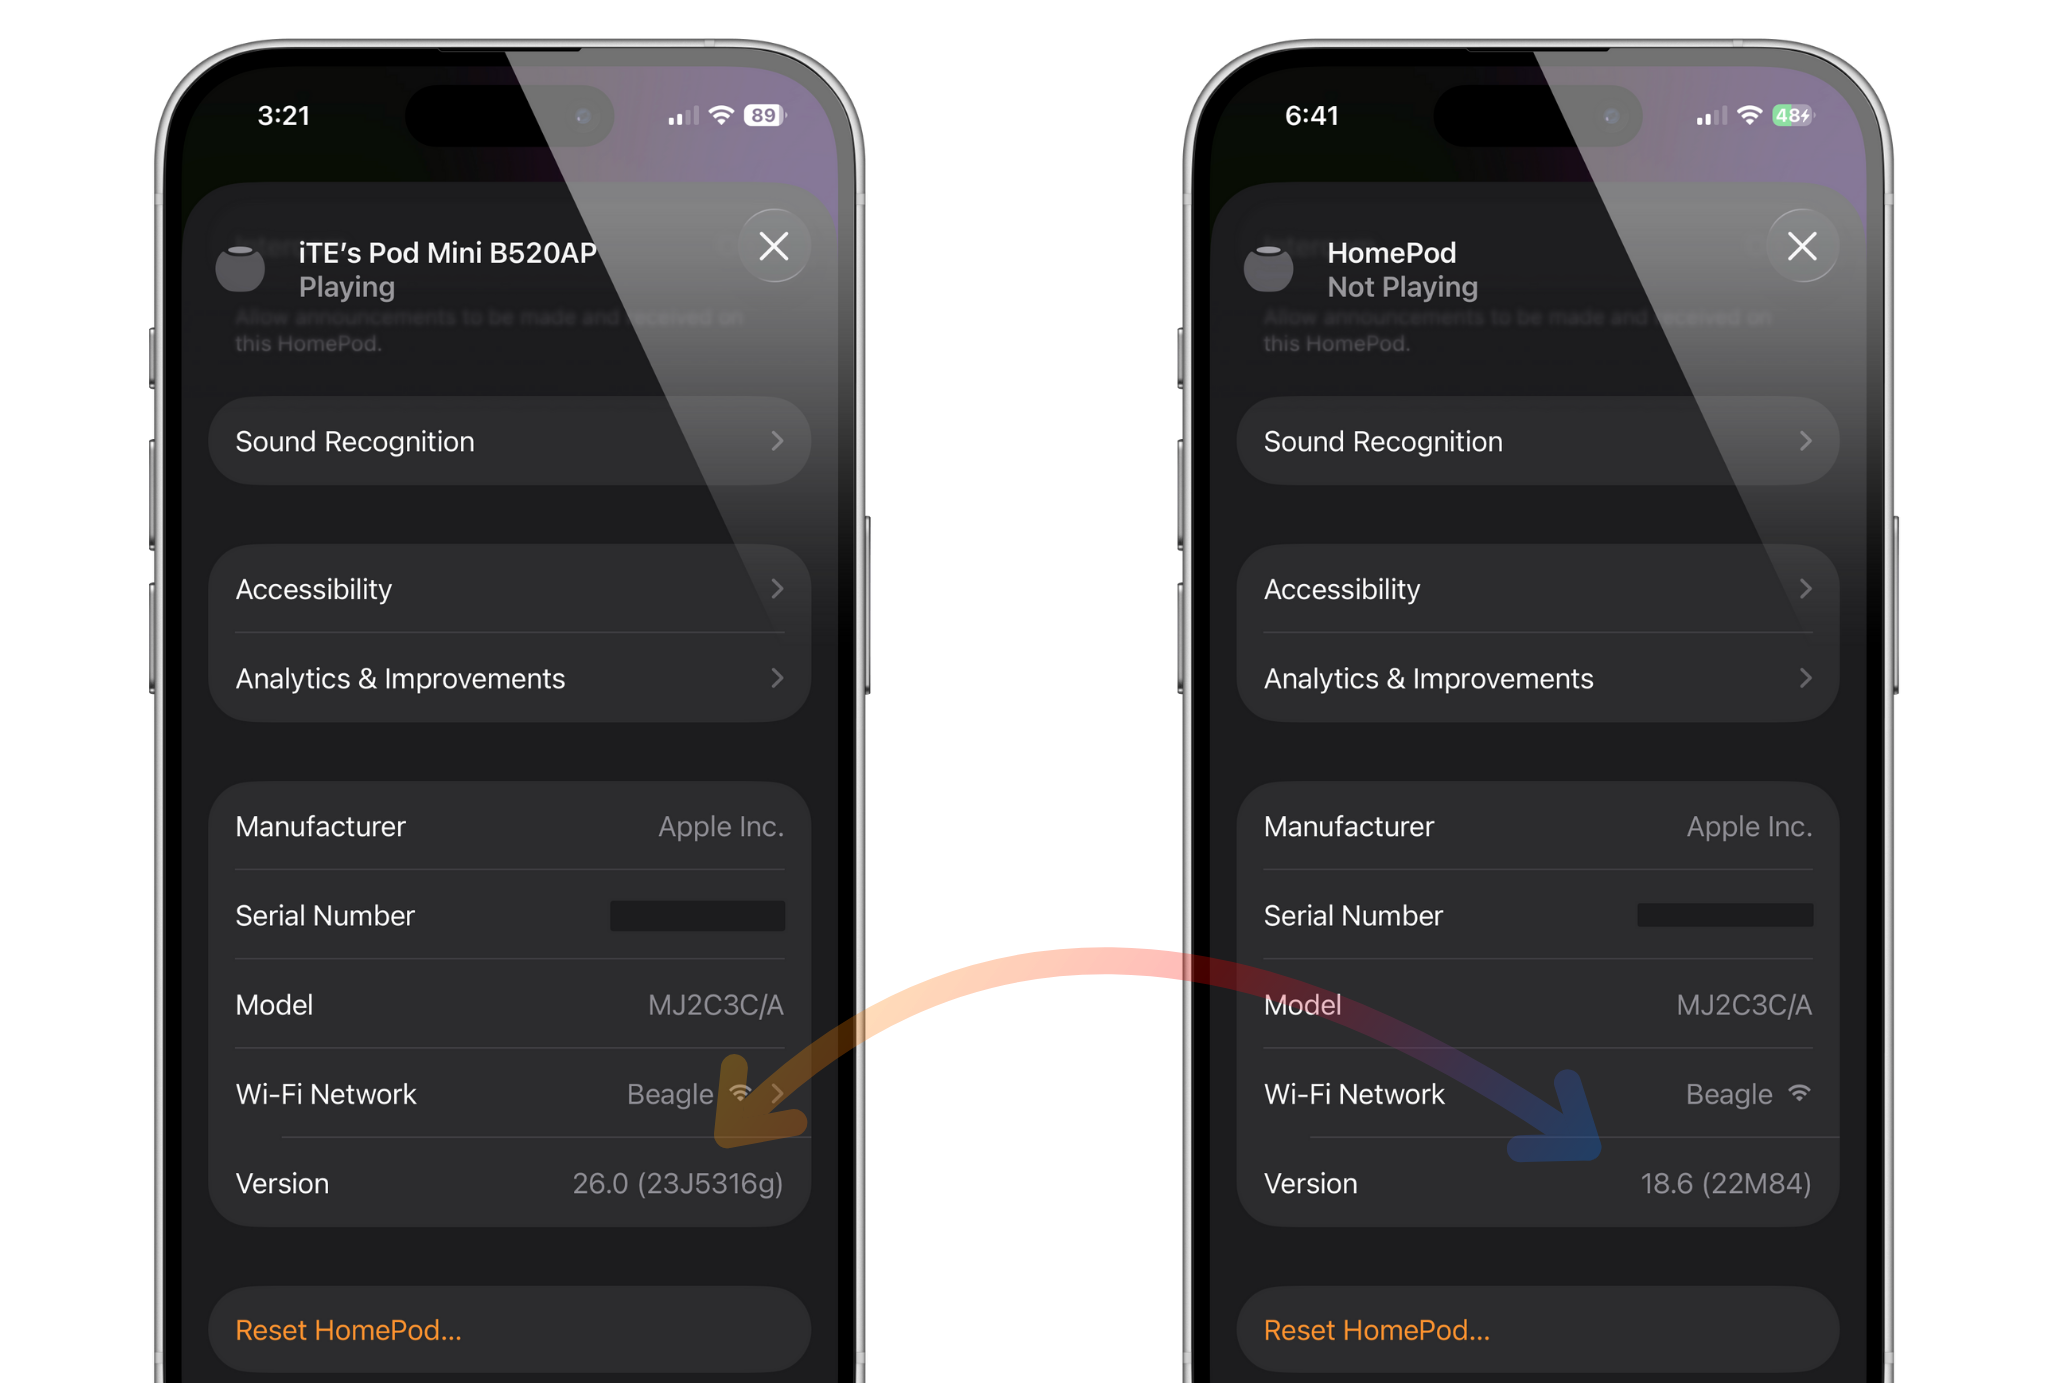
To check if your HomePod has been downgraded, open the Home app, select your HomePod, and scroll down to view the software version number.